

How to Assign Static IP to AWS Lambda
In this article, we will address this network challenge with Lambda function and explain in a 6 steps how to assign a static IP to it.


Imagine you are using Lambda function to integrate with a Third Party Service that for security reasons has a firewall protecting its resources only allowing specific IP addresses. In order to be able to get your IP address whitelisted you need a static IP.
So in this article, we will address this network challenge with AWS Lambda and explain in a few steps how to assign a static IP to your Lambda function.
Considerations
AWS Lambda is not the same an as EC2 instance as it runs on containers within the AWS infrastructure. Traffic would appear to be coming from certain IP addresses but there is no way to configure which IP address is used meaning that the IP address that the requests are sent from will not be the same.
Also by default, Lambda functions are not launched within a virtual private cloud (VPC), so they can only connect to public resources accessible through the internet.
Solution
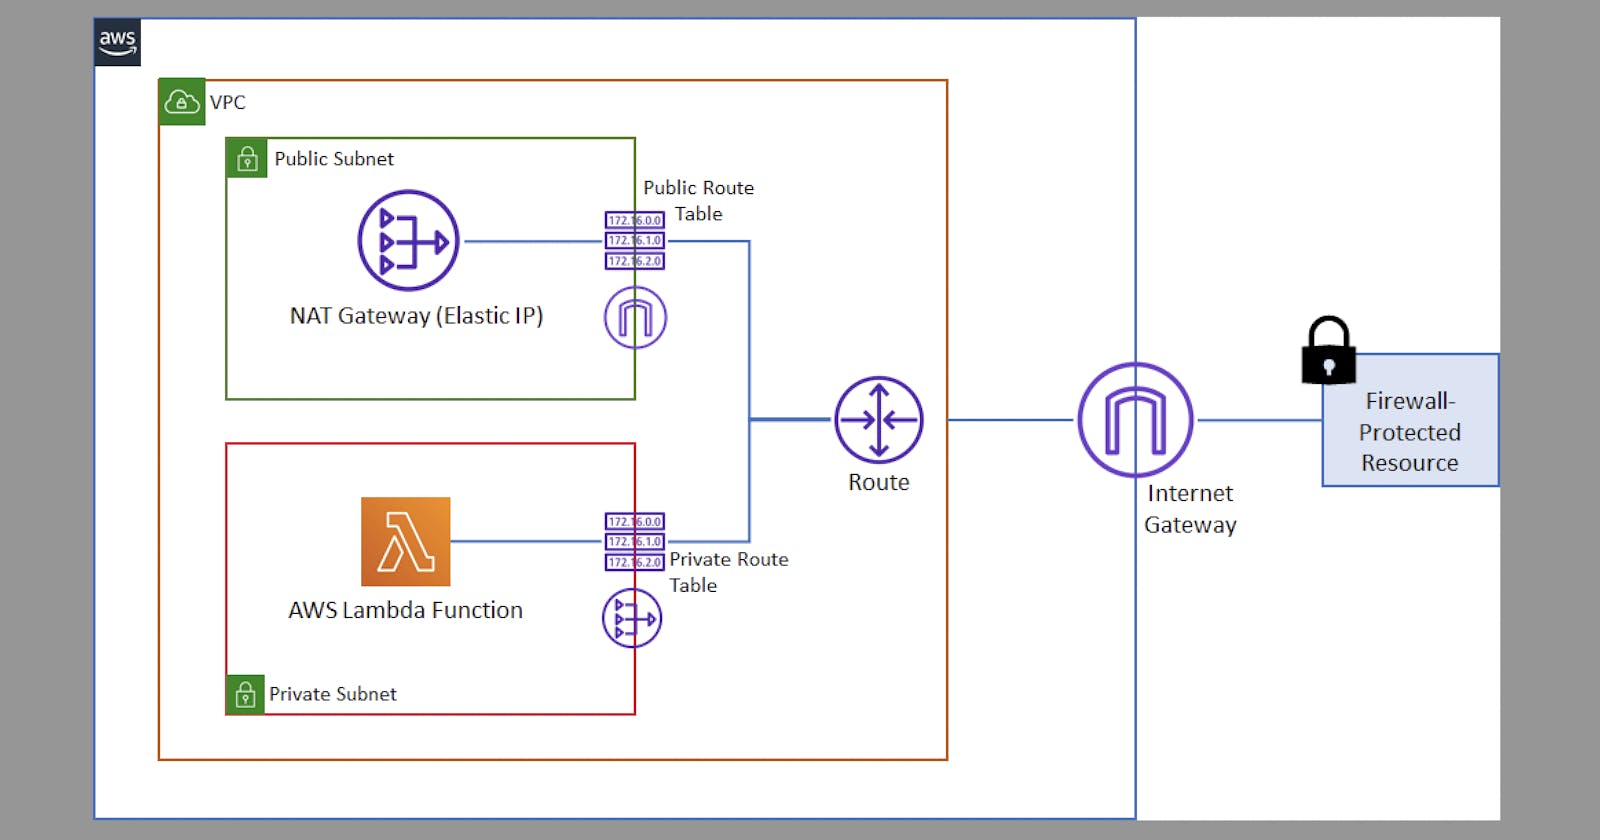
Lambda runs your functions in a secure VPC with access to AWS services and the internet. Lambda owns this VPC, which isn't connected to your account's default VPC. When you connect a function to a VPC in your account, the function can't access the internet unless your VPC provides access.
Internet access from a private subnet requires network address translation (NAT). To give your function access to the internet, route outbound traffic to a NAT gateway in a public subnet. The NAT gateway has a public IP address and can connect to the internet through the VPC's internet gateway.
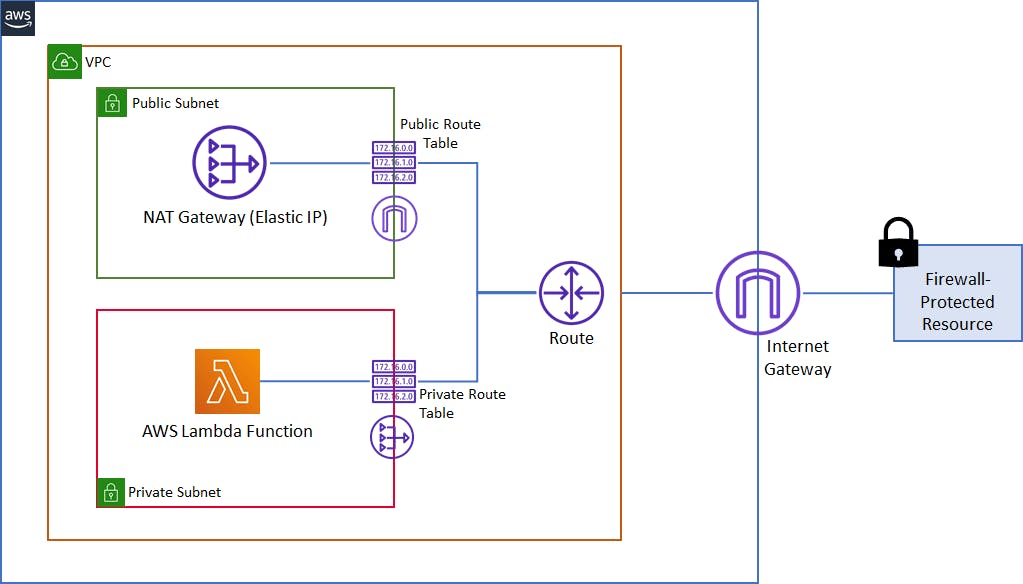
That said, we are going to create a virtual private cloud (VPC), two sets of subnets for Public/Private, Internet Gateway, NAT Gateway (You get charged for it) with an Elastic IP, two Route Tables for Public/Private, and finally, configure our Lambda function to this VPC.
Steps
All the steps will be conducted via AWS console.
1. Create VPC
- Navigate to VPC from Services
- Go to Your VPC from side menu
- Click Create VPC button
- Set your VPC's name (i.e.:
lambda) - Set IPv4 CIDR block (i.e.:
10.0.0.0/16) - Scroll down and click Create VPC button
After creating a VPC, you can check that it's listed with state Available as shown.

2. Create Public/Private Subnets
- From the side menu again go to Subnets
- Click Create subnet button
- Select the VPC you just created
- Name your subnet (i.e.:
lambda-public) - Set IPv4 CIDR block to
10.0.2.0/24 - Scroll down and click Create subnet button
Repeat the above steps to create the private subnet as well (with lambda-private as a name and 10.0.1.0/24 as CIDR block)

3. Create Internet Gateway
- From the side menu again go to Internet Gateways
- Click Create internet gateway button
- Name your gateway (i.e.:
lambda) - Select it and attach it to your VPC from Actions dropdown on top-right
- Scroll down and click Create internet gateway button

4. Create NAT Gateway
- From the side menu again go to NAT Gateways
- Click Create NAT gateway button
- Name your gateway (i.e.:
lambda) - Select the public subnet
lambda-publicyou created earlier - Generate IP by clicking on Allocate Elastic IP or choose an existing one
- Scroll down and click Create NAT gateway button

5. Create Route Tables Public/Private
- From the side menu again go to Route Tables
- Click Create route table button
- Name your route table (i.e.:
lambda-public) - Select the VPC you created earlier
- Scroll down and click Create route table button
Repeat the above steps to create the private route table as well (with lambda-private as a name)
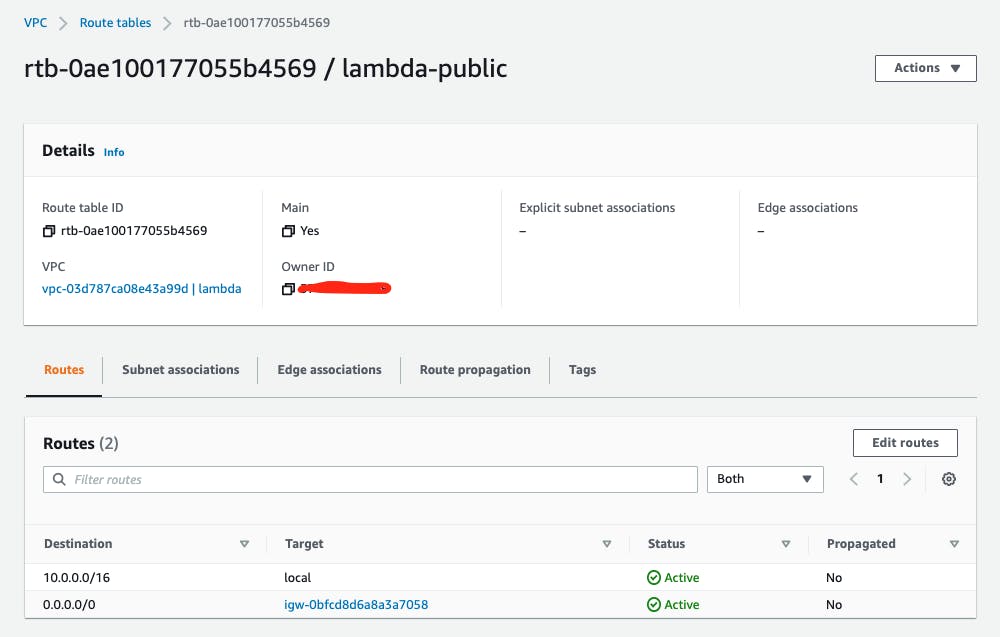
Now select the "public" route table lambda-public created above. From the summary section select Routes Tab then click on Edit Routes button then click on Add route and add destination address as 0.0.0.0/0 then select the Internet Gateway created above as target click Save Changes to have it as shown below.
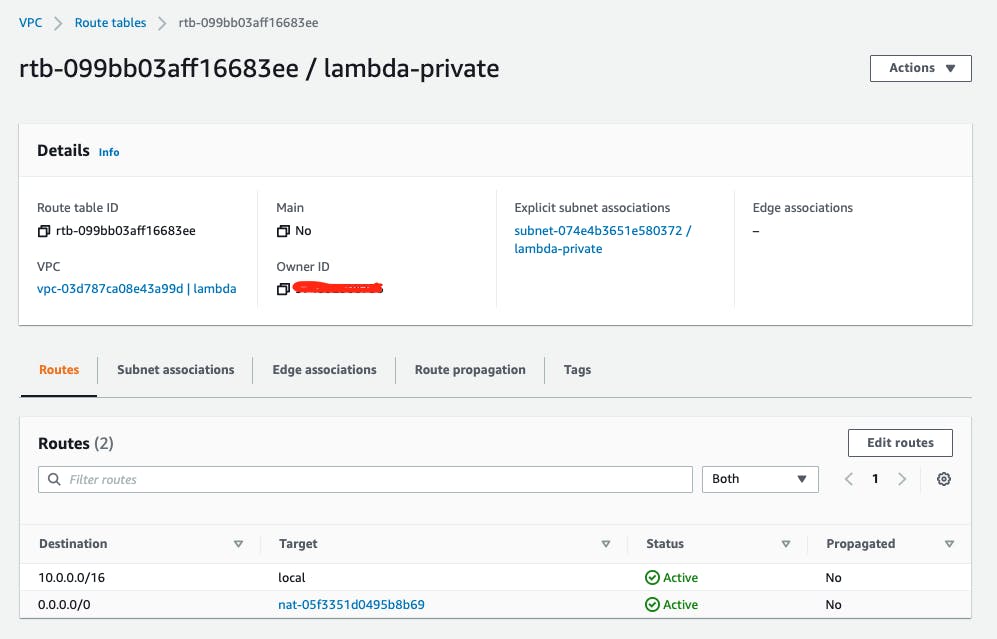
Now the "private" route table lambda-private. The same to Add route and add destination address as 0.0.0.0/0 but then select the NAT Gateway created above and save to have it as shown below.
6. Connect Lambda to VPC
- Go to Lambda service then select your function
- Navigate to Configuration tab, then VPC from sidemenu
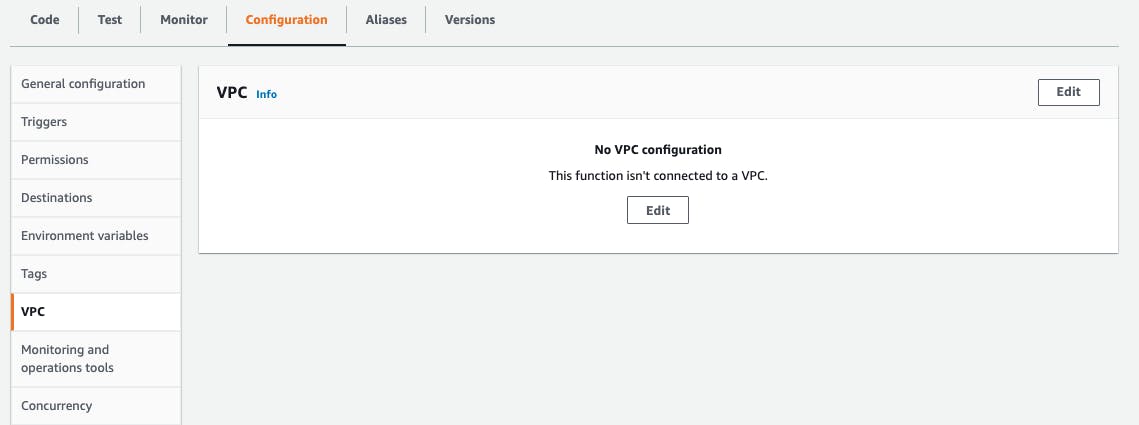
- Click on Edit and choose the VPC you created earlier
- Choose also the private subnet you created earlier
- Choose the default Security Group (or create a new one if necessary)
- Hit the Save button
You did a great job so far.
Validation
Now it's time to test and validate that everything is working together. Within the Lambda function that created inside your VPC, you can make a request to the Internet. A simple test can then be to use the request module (in Node.js) to make a request to www.example.com. If the request is successful then we know the request is being successfully NATed. The Elastic IP address that we created earlier can then be added to any Third Party's IP whitelists.
Also if you are invoking your Lambda via API Gateway you could log the Source IP within the event object to make sure it's now static and equals to the Elastic IP we created earlier as follow:
console.log('Source IP: ', event.requestContext.identity.sourceIp);
Conclusion
In order to assign a public/static IP to any Lambda function, your only good option is to deploy it into a VPC with an Internet Gateway and configure routing from the Lambda's subnet through a NAT which has an Elastic IP. Then the Third Party Service you want to use can whitelist this Elastic IP.
That's it!
I'd love for you to leave me a feedback below in the comments!